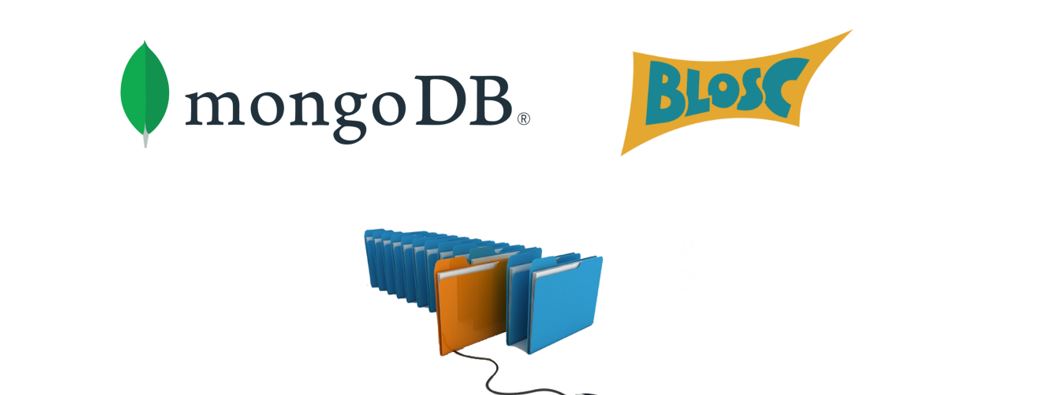
Are you looking at storing images in MongoDB and wondering can MongoDB store images? Worry not! you are at the right place and with the right people. We will make you understand and also let you know the tricks and logic that you will need. So, without any more talk let’s get straight into the topic, can MongoDB store images.
Uninstall MongoDB on Ubuntu: Few easy steps
The Standard Way: Can MongoDB store images
The standard way of storing images in MongoDB is very simple. All you need to do is convert binary images into Base64 format and then store them into MongoDB. In the standard way, the Base64 conversion will increase the size of the images by 3 to 4 times. But if you want to store multiple/larger images in one MongoDB document using this method can cause many different problems. Because document exceeding maximum size and the maximum size allowed for a MongoDB document is 16MB.
A Walkthrough to Blosc
Blosc is a very high-performance compressor optimized for binary data. It works very well for compressing numerical arrays.
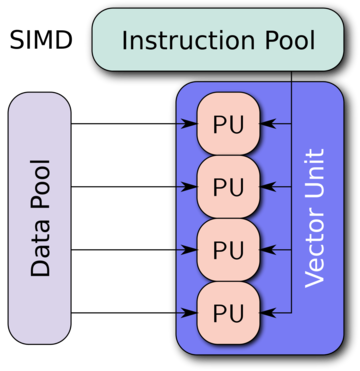
This blocking method is used to reduce activity on the memory as much as possible. The blocking technique works by diving datasets in blocks that are small to fit in the L1 cache of the modern processors and performing compression and decompression there. It also makes use of the Single Instruction, Multiple Data (SIMD), and multi-threading capabilities present in multi-core processors so as to speed up the compression/decompression process.
python-blosc is a type of package that wraps blosc. Only Python 3.6 or above are supported by python-blosc.
However, blosc can be used on binary data. But here in this blog, we are going to look at using blosc to compress NumPy arrays as this completes are two purposes:
- Storing numpy arrays itself into MongoDB.
- Storing images (in numpy array format) into MongoDB.
Learn about grouping in MongoDB !! ~~> ~~>
Installing Blosc ~~>
In order to install the python-blosc package easily using the Conda, to do that use the code given below.
$ conda install -c conda-forge python-blosc
If you want to install python-blosc via pip, then, use the following command:
$ pip install blosc
Important: The library python-blosc is directly dependent on cmake and scikit-build packages. So, it is very important that you install these packages first. In order to do that use the command given below.
$ pip install cmake
$ pip install scikit-build
Compressing Numpy Array using Blosc ~~>
The first thing you need to do is to convert images into a NumPy array. After that, you may need to use the pack_array function in blosc to compress the NumPy array. The steps are as follows:
- Import necessary modules
import numpy as np
from numpy import asarray
from PIL import Image
import blosc
- Now, open the image using Pillow module.
img = Image.open(path/to/image)
- After that, convert the image into a NumPy array using the asarray function.
image_array = asarray(img)
- FInally, compress the NumPy array using the pack_array function of the blosc module.
compressed_bytes = blosc.pack_array(image_array)
Once you execute this function NumPy array will be converted into compressed bytes. Now you can store the new compressed bytes with ease into MongoDB document. Also, the compression keeps the image data unaffected. The actual size of the image is also minimized to a considerable extent without the image data getting distorted.
Want to learn when to shard in MongoDB? Here’s the guide that you need !! ~~>
Decompressing Numpy Array using Blosc ~~>
On retrieving the compressed bytes from the MongoDB document, you need to get back the image from compressed bytes.
- To perform decompression you have to make use of unpack_array function in blosc module to convert compressed bytes to numpy array.
decompressed_array =
blosc.unpack_array(compressed_bytes)
- Now from the NumPy array that we got in the previous step, you can retrieve the image object using from array function.
im = Image.fromarray(decompressed_array)
- Now you can store the object as an image file of the desired extension using the save function.
im.save("filename.png", quality = 95)
When you execute these functions you can easily retrieve compressed bytes. You can change the decompressed back to NumPy array and restore the image. The quality and size of the image will be the same as the image before compression.
Also, decompression and compression can happen very quickly. The pack_array andunpack_array methods use pickle and unpickle respectively, behind the scenes.
WRAPPING UP !! ~~> ~~>
In this post, we have seen how we can utilize the blosc module to support a variety of compression and decompression techniques. Thereby, we have also come to know how we can store images in MongoDB. I hope that you find this information worth your time. So, just enjoy this post and take back the learning as much as you can. On that note, until next time, see ya !! Goodbye !! ~~> ~~>
:: ~~> ~~> :: ** :::::: ** :: )) ** :: ** (( ~~> ~~>