Now, that we have seen and had an in-depth study of MongoDB. While also going in details with its various basic functionalities, its uses and other topics of relevance. Let’s look into the topic MongoDB for Python. Because without using MongoDB with any programming language it won’t be too suitable to work with. Making MongoDB compatible with Python by creating connections will enhance its interoperability and also make our job easier.
MongoDB for Python with PyMongo
In the previous articles, we have seen what MongoDB is? Also, we have got an idea on creating and managing databases using the ineractive shell. So, now, lets take our experience a notch higher and start using MongoDB with Python.
PyMongo
This is an official Python driver for use with MongoDB. Lets look at some great examples to get a hang of how to use PyMongo to work-around Python and MongoDB.
We can perform a number of tasks with the PyMongo library like :
- Establishment of database connections
- Working around with databases
- Seemingly with collections and documents
- Cursor Manipulation
- Encoding
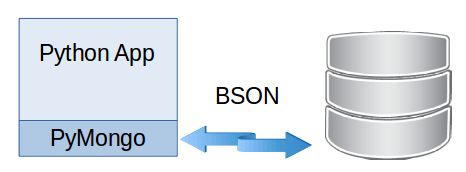
Thus, PyMongo, in general provides various set to tools to perform the basic CRUD operations by facilitating a connection with the MongoDB server.
PyMongo Installation
Before, we can use PyMongo, we need to first install it in our Python environment. This, we can do by using PyPi that is the pip installation method. Lets see how :
pip install pymongo
Importing PyMongo into Python
Now, once you’re through with the installation. You now need to start a Python interactive session and run the subsequent import command. If this command works fine then you know that the installation has been correct.
import pymongo
Here’s a guide on how to connect SQL server with Python
Establishing a Connection
Now, that the installation is complete and we have also imported PyMongo into Python. Thus, we now need to establish a connection to a database, you would like to make a Mongo-Client instance of. The MongoClient class provides a general client for a MongoDB server or instance to run.
Note: Each client object usually features a built-in connection pool. This pool by default handles up to 100 connections to the server thus.
from pymongo import MongoClient
client = MongoClient()
client
MongoClient(host=['localhost : 3402'], …, connect=True)
The above code thus creates a connection to the default localhost and the port 3402. It is so because MongoClient takes a group of arguments. These arguments thus permit you to specify custom host, port, and other connection parameters. This command also comes in quite handy at different steps of the game.
To use the use the MongoDB url format we need to use the command as below :
client = MongoClient("mongodb://localhost : 3402")
Once you’ve instantiated MongoClient. Its instance can be utilized to ask for a specific database connection. Similar to the work we did in MongoDB shell which you have seen earlier.
How to Work with Databases, Documents and Collections
After you have connected your instance of MongoClient. You can access and manage and database which uses the MongoDB server. Lets see how :
db = client.employee
db
Database(MongoClient(host=['localhost : 3402'], …, connect=True), 'employee')
Herein, it is clear that we will be working with the employee database as of now.
Creating Documents
Storing data in your database via PyMongo is analogous to what we did in the MongoDB shell. Before that, we though need to create a document. In Python,we generally make use of dictionaries to build documents thereof. Lets see one such example :
specimen = {
… "title": "Working with PyMongo",
… "author": "Shubham",
… "contributors": [
… "Soumya",
… "Ayush",
… "Kavin",
],
… "url" :  "https://pccshubham.medium.com/python-json/"
… }
Now, suppose we need to specify the collection we will be using. For this we use the below command :
specimen = db.specimen
specimen
Collection(Database(…, connect=True), 'employee'), 'specimen')
Here, we see that “specimen” is the Collection instance which will depict a physical collection in our database.
Inserting a Document
Now to insert documents into specimen we can do so by calling .insert_one() thereon with a document as an argument:
res = specimen.insert_one(specimen1)
res
print(f"One Specimen : {res.inserted_id}")

#Output :
One Specimen: 79086b7d87eb0fbf73ebf72f
Here, .insert_one() takes speciment1, inserts it into the specimen collection and returns an .insert_one() response. Note that the objectId generated is dynamic in nature.
Inserting Multiple Documents
Now, what if we need to insert many documents to feature in the database. For this, we thus imply the use of .insert_many() function.
specimen2 = {
… "title": "Sorting in MongoDB",
… "author": "Shubham",
… "contributors": [],
… "url": "https://hackanons.com/2021/06/sorting-in-mongodb.html"
… }

specimen3 = {
… "title": "Object-Oriented Programming (OOP) in Python",
… "author": "Shubham",
… "contributors": [],
… "url": "https://pccshubham.medium.com/object-oriented-python-vs-object-oriented-java-codes-comparison-4b3dc04dd239"
… }

new_res = specimen.insert_many([specimen2, specimen3])

print(f"Multiple Specimens : {new_res.inserted_ids}")

#Output :
Multiple Specimens : ObjectId('80098511c87fbc0fbf73dbf72e'), ObjectId('6890511c87eb0fef73dbf73d')
A point to note here is that .insert_many() is comparatively faster than .insert_one() applied many times.

Retrieving Documents
To retrieve any documents from a set , we thus make use of the .find() function. For this we need to import the “pprint” library.
import pprint

for file in specimen.find():
… pprint.pprint(file)
…
{'_id': ObjectId('80098511c87fbc0fbf73dbf72e')
… "author": "Shubham",
… "contributors": [],
… "title": "Sorting in MongoDB",
… "url": "https://hackanons.com/2021/06/sorting-in-mongodb.html"
… }
…

{'_id': ObjectId('6890511c87eb0fef73dbf73d')
… "author": "Shubham",
… "contributors": [],
… "title": "Object-Oriented Programming (OOP) in Python",
… "url": "https://pccshubham.medium.com/object-oriented-python-vs-object-oriented-java-codes-comparison-4b3dc04dd239"
… }
Here, the .find() function returns the details of the various documents stored in there.
Note: You can also use .find_one() to retrieve one document.
Closing the Connections
Now, that we have seen all the various operations generally needed to be performed while working with documents. Here, we thus realize that as we establish a connection to a MongoDB database. We also need to close the connection so that it doesn’t hamper the performance.
Thus, we can close the connection using the command given below :
client.close() # where client is the MongoDB instance.
WRAPPING UP — MongoDB for Python
In this, tutorial we have got an idea of various steps needed to setup connection to MongoDB server with Python. We have thus seen the other subsequent points. Like, creating, inserting and retrieving documents, thus. We have also lastly seen when and how to close the connection after completion of our task.
Thus, this guide will come in handy for anyone who is starting up with MongoDB for Python topic.