
Safety for all must be insured in today’s world and it is necessary that efficient and proactive safety systems should be implemented in public places and households. This IOT based project modifies the existing safety model installed in industries and this system also be used in homes and offices. The main objective of this IOT based work is designing micro-controller based toxic gas detecting and alerting system.
The hazardous gases like LPG and propane were sensed. If the hazardous gases exceed the normal level then an alarm is triggered immediately at the incident place and also an alert message (i.e. Push Notification) is sent to the authorized person through the INTERNET with the help of used ESP8266 module incorporating Things Speak Cloud. The advantage of this IOT based automated detection and alerting system over the manual method is that it provide real time response and accurate detection of an emergency and in turn leading faster control over the critical situation.
How does IOT based gas detection work :
Hardware Required for IOT based Project :
Steps for Creating IOT based Project:
1st Step : Hardware Connection –
Circuit Diagram:

2nd Step : Configuring Thingspeak Cloud –
 |
| Source: www.thingspeak.com |

Now click on the “New Channel” Give it a name and select two fields. If you want you can fill more info about your channel, e.g. Latitude and Longitude of your sensor. If you want to share sensor info with your friends (and more..) click on the “Make Public?” check box option. Finally click on the “Save Channel” button.

3rd Step : The Code
#include <SoftwareSerial.h>

SoftwareSerial espSerial = SoftwareSerial(2,3); // arduino RX pin=2 arduino TX pin=3 connect the arduino RX pin to esp8266 module TX pin - connect the arduino TX pin to esp8266 module RX pin


float sensor=A0;

float gas_value;

String apiKey = "5G0NEIEWV7FQWERTY"; // replace with your channel's thingspeak WRITE API key

String ssid="kavin"; // Wifi network SSID

String password ="12345612"; // Wifi network password

boolean DEBUG=true;

#define VOLTAGE_MAX 5.0

#define VOLTAGE_MAXCOUNTS 1023.0

//======================================================================== showResponse


void showResponse(int waitTime){

long t=millis();

char c;

while (t+waitTime>millis()){

if (espSerial.available()){

c=espSerial.read();

if (DEBUG) Serial.print(c);

}

}


}


//=======================connection to thinkspeak.com=================================================

boolean thingSpeakWrite(float value1){

String cmd = "AT+CIPSTART="TCP",""; // TCP connection

cmd += "184.106.153.149"; // api.thingspeak.com

cmd += "",80";

espSerial.println(cmd);

if (DEBUG) Serial.println(cmd);

if(espSerial.find("Error")){

if (DEBUG) Serial.println("AT+CIPSTART error");

return false;

}


String getStr = "GET /update?api_key="; // prepare GET string

getStr += apiKey;


getStr +="&field1=";

getStr += String(value1);

//getStr +="&field2=";

//getStr += String(value2);

// ...

getStr += "rn";


// send data length

cmd = "AT+CIPSEND=";

cmd += String(getStr.length());

espSerial.println(cmd);

if (DEBUG) Serial.println(cmd);

delay(100);

if(espSerial.find(">")){

espSerial.print(getStr);

if (DEBUG) Serial.print(getStr);

}

else{

espSerial.println("AT+CIPCLOSE");

// alert user

if (DEBUG) Serial.println("AT+CIPCLOSE");

return false;

}

return true;

}

//================================================================================ setup

void setup() {

DEBUG=true; // enable debug serial


//----------my sensor code-----------

pinMode(LED_BUILTIN, OUTPUT);

pinMode(sensor,INPUT);

Serial.begin(9600);

espSerial.begin(115200); // enable software serial

// Your esp8266 module's speed is probably at 115200.

// For this reason the first time set the speed to 115200 or to your esp8266 configured speed

// and upload. Then change to 9600 and upload again


//espSerial.println("AT+RST"); // Enable this line to reset the module;

//showResponse(1000);


//espSerial.println("AT+UART_CUR=9600,8,1,0,0"); // Enable this line to set esp8266 serial speed to 9600 bps

//showResponse(1000);


espSerial.println("AT+CWMODE=1"); // set esp8266 as client

showResponse(1000);


espSerial.println("AT+CWJAP=""+ssid+"",""+password+"""); // set your home router SSID and password

showResponse(5000);


if (DEBUG) Serial.println("Setup completed");

}


// ======================================================================= loop

void loop() {


//---------my gas sensor value reading-------------------


gas_value=analogRead(sensor);

Serial.println(gas_value);

delay(1); //delay in between reads for stability

if(gas_value>250){


// initialize digital pin LED_BUILTIN as an output.


digitalWrite(LED_BUILTIN, HIGH);

//delay(250);

// digitalWrite(LED_BUILTIN, LOW);

//delay(250);


float t = gas_value*(VOLTAGE_MAX / VOLTAGE_MAXCOUNTS); //convert gas value to voltages


if (isnan(t)) {

if (DEBUG) Serial.println("Failed to read from MQ5");

}


else{

if (DEBUG) Serial.println("Voltage="+String(t));

thingSpeakWrite(t); // Write values to thingspeak

}

// thingspeak needs 15 sec delay between updates, */

delay(20000);

}

else{

digitalWrite(LED_BUILTIN, LOW);

}

}
|
|
Serial Monitor Output When Gas Leakage Detected:

Monitor Thingspeak Channel Output:

POSTING TO PUSHBULLET VIA THINGSPEAK
Where do you start?
Step 1: setup the PushBullet service (free)
First you need to go to PushBullet and make a new free account. Activate your account, login in the website and you will see the next screen:


Get the access token and save it to a notepad text file.
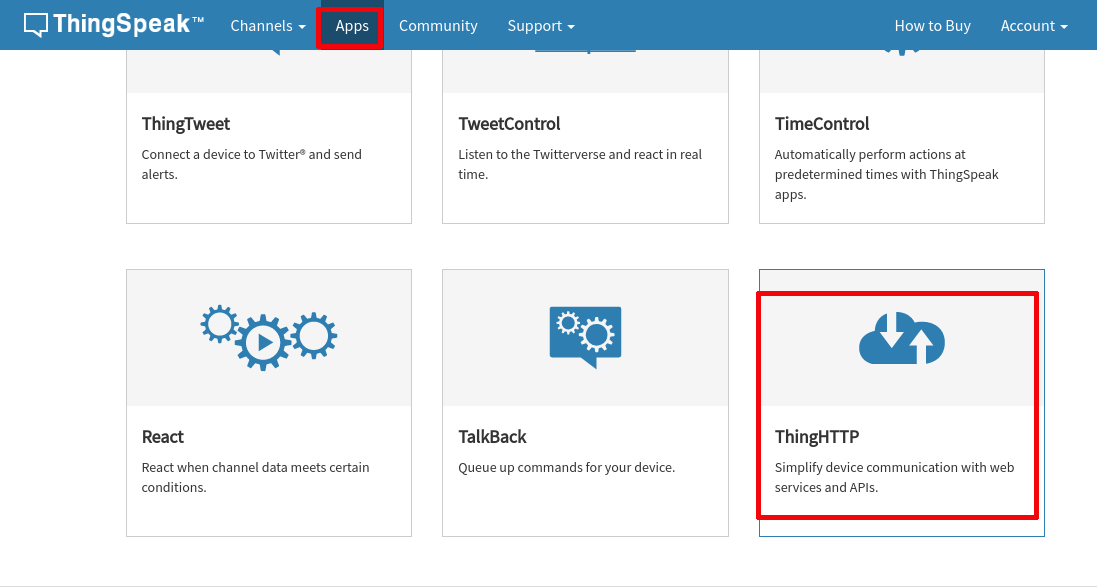
Step 2: Setup the ThingSpeak Http, React App:


Next we need to create the ThingSpeak App based on “ThingHTTP”. Click on Apps in the
Menu bar and then select ‘ThingHTTP’
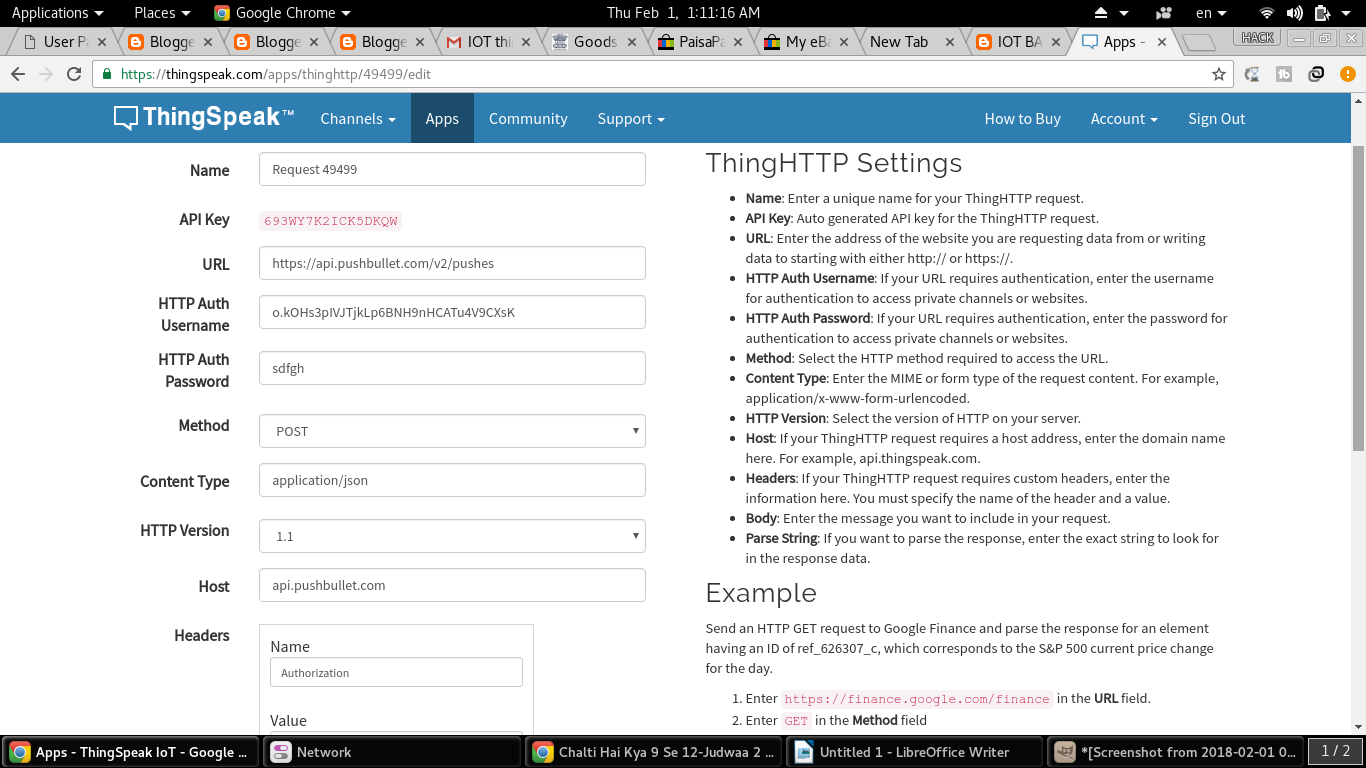
Form:
| Name: | Request 49499 |
| API Key: | 693WY7K2ICK5DKQW |
| URL: | https://api.pushbullet.com/v2/pushes |
| HTTP Auth Username: | o.kOHs3pI{ PUSH BULLET ACCESS TOKEN HERE} |
| HTTP Auth Password: | sdfgh |
| Method: | POST |
| Content Type: | application/json |
| HTTP Version: | 1.1 |
| Host: | api.pushbullet.com |
|
Headers:
|
Name: Authorization Value: Bearer [PushBulletAPI] |
| Body: | {“type”: “note”, “title”: “IOT SOS ALERT”, “body”: “LPG/CNG Gas Leakage”} |
| Parse String: | |
| Created: | 2017-04-27 7:35 am |


I am using a Mq 2 sensor. I am getting an approximate 1000 gas value in normal and about 60 when gas is detected. What changes should i make
Voltage=1.28
AT+CIPSTART="TCP","184.106.153.149",80
AT+CIPSEND=50
AT+CIPCLOSE
It has not been updated. Is there a workaround?
I am also facing the same 🙁
message not send mbo
i want to know that this sensor detect the LPG gas or the fire flame
this sensor detects LPG gas and smoke also in some amount
What should we do.. I am also facing the same..
When your website or blog goes live for the first time, it is exciting. That is until you realize no one but you and your. bellfires
can i use the same code for mq135 if there must be any changes please specify me i need it for y project
No there will no change for any MQ series sensor
I want to change ESP card with GSM or SIM arduino how!
I want to change ESP card with GSM or SIM arduino how!
Voltage=1.28
AT+CIPSTART="TCP","184.106.153.149",80
AT+CIPSEND=50
AT+CIPCLOSE
It has not been updated. Is there a workaround?
i am not able to view anything in the serial monitor once the code is dumped
me toooooo
In this project ,do the header part is compulsory?and what will be the authorization and value of the header?my project is not working. and what will be this following part?
HTTP Auth Username: o.kOHs3pI{ PUSH BULLET ACCESS TOKEN HERE}
if you want to avoid tragic incidents like this then you should fit gas leak detector.
The code compiles succesfully and works perfectly fine, but i am unable to get notification on my mobile through Pushbullet. What to do? What is that Http authorization password in Thingshttp
Facing Same problem
hello guys.my field chart 1 does not display data.what should i do
why message cannot receive?
After reading this post I have gained some additional knowledge on Leakage Detection. Thanks for sharing such an informative post. Keep sharing! Best Gas Company
Gas Leak detector is the effective one to avoid hazard situation in workplace or home. The gas leak detector you shared here was simply amazing. Thanks.
Gas Leak Detector
There are a few intriguing points in time in this post but I do not determine if I see these people center to heart. There is some validity but I will take hold opinion until I investigate it further. Excellent article , thanks and we want more! Added onto FeedBurner too Gas Safe Engineer in Croydon
I have bookmarked your blog, the articles are way better than other similar blogs.. thanks for a great blog! 12V Electric Car Jack and Wrench for Smart Travel
Is it possible to make this device only by using ESP 32 DOIT DEVKIT V1 ?? instead of using both Arduino and ESP8266.. IF YES THEN PLEASE SHARE THE CODE WITH US
I read your blog and i found it very interesting and useful blog for me. as we provide lpg price comparison UK at affordable prices. for more info visit our website.
important of these electronic devices is fully automatic washing machines, and therefore this advanced technology needs to تصليح غسالات
Same problem btw not sending data to thinkspeak cloud