Have you ever thought of devising a way to send automatic SMS? Yes, you heard it right! It is possible to send automatic SMS. Thus, in this guide, we will learn how to send automatic SMS using Python.
Want to perform OTP verification using Python? Here is your guide to it !!
How to send automatic SMS using Python
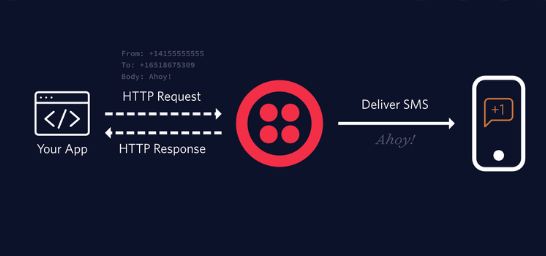
Short Message Service (SMS) text messages are ubiquitous throughout the world. In this post, you are going to learn about how to send SMS using Python; with the help of a Web-API (Web Application Programming Interface). But before that we need some tools. So, let us take a quick look at the tools we need to do so:
Requirements
- Python 2 or Python 3
- pip and virtualenv to manage application dependencies
- A free Twilio account to use the SMS web API.
- Twilio Python helper library, version 6.0.0 or higher.
Web Application Programming Interface
You will use a web API to make sending SMS easier and more reliable. So, let’s see how to do it:
- Go to the Twilio website and sign up for a free trial account (to get a new phone number).
- Now, login to your account.
Note: With the Twilio trial account, you can send text messages to your own validated phone number. But, if you want to send text messages to any other phone number you will have to make a paid upgrade to your account to send messages.
Installing the dependencies
This code uses a helper library that makes it easy to send text messages from Python. You will need to install the helper library from PyPI into a virtual environment. Thus, we will have to first create the virtualenv. So, type the below-given command in the terminal:
virtualenv sendsms

# Further, to activate the virtualenv write :
source sendsms/bin/activate
Now, you will have to install the latest version of the Twilio Python helper library. We will thus use version 6.0.0 or later; which is important because the syntax in this post is not compatible with 5.x and earlier Twilio helper library versions.
pip install twilio >= 6.0.0
Python Code
Now, start the Python interpreter in the terminal with the python command, or create a new file called auto_sms.py.
- To connect our Python code to our Twilio account, we need to get our credentials from the Twilio console.
- Go to the Twilio console and copy the SID account and authentication token into your Python code.
Enter the following code in the interpreter or in the new python file:
from twilio.rest import Client           # To import the Twilio Client

#Next, we need to enter the SID and Auth Token of the Twilio Account
panel = Client("ACxxxxxxxxxxxxxx", "zzzzzzzzzzzzz")

#Now, we need to enter the twilio number in the "from_" variable and our number in the "to" variable to test the efficacy of this code
panel.messages.create(to="+9170xxxxxxxx",
                       from_="+9180xxxxxxxx",
                       msg = "Hi ! Shubham this side :)")
- Run the code written above and see the magic of this code, as you will get the message “Hi ! Shubham this side 🙂 ” on your number.
- Hurray! that’s it.
Note: The Auth Token should be kept as a secret, this is like your password(so, do keep it secretive).
Automating WhatsApp messages with Python
Before we proceed with this topic, we need to install Python, Pycharm, and Pywhatkit.
- Thereafter, open Pycharm and create a new project.
- Give your new project a name – Auto_WhatsApp (any name for that matter). Then select python file.
- Google pywhatkit or visit the website here and copy the pywhatkit installation link.
- Now, click the terminal at the bottom left of Pycharm. Paste the copied Pywhatkit installation link into the terminal and press Enter to install it.
- Now write the following code in the Pycharm IDE :
import pywhatkit
pywhatkit.sendwhatmsg('+9178xxxxxxxx', 'I love you son ! You are my best friend, remember it! ', 7, 00)
- That’s it ! Your message will get delivered to the aforementioned number at the time mentioned in the code (7,00….. this signifies 7am).
Note: The time for this code is entered in the 24-hour clock format. So, if we want to mention 5pm it should be written as 17,00.
Note: On execution, you will get a somewhat similar message to; “In 95 seconds, web.whatsapp.com will open and after 15 seconds, a message will be delivered.
SUMMING UP !!
In this post, we got to know the code to send an automatic message to a number using Python. We also learned the technique we can use to send an automated message on WhatsApp too. As we know there is a huge collection of specialized libraries in Python. We thus just need to be aware of them to utilize them appropriately. Hope that this educative experience makes your more knowledgeable and wanting to experiment further. With that thought, until next time, see ya!! Goodbye !! :)~~
**::::::** ::))::((~~>>