Web servers are all around us. Every application, every framework uses an internet server. It’ll sound fancy, but every web server does three things: It listens for HTTP requests, handles those requests, and sends responses back to the user. In this blog, we will attempt to build our own server with Python, but, before that, lets discuss What is a Web Server for Python in the first place.
What is a Web Server
Web servers answer Hypertext Transfer Protocol (HTTP) requests from clients and remit a response containing a standing code and sometimes content like HTML, XML or JSON also.
Now, before we move forward to seeing why web servers are necessary or important. Lets give a look into Client-Server Requests and Handling.
Client-Server
A client is one browser like IE, Firefox or Chrome for that matter, which sends an invitation to an internet server to request some information or page. But, it can also be a headless browser, commonly use for testing, like phantomjs.
Web servers generally process these requests from the above clients. The results of the online server’s processing may be a response code and commonly a content response.
In a simple case, the client requests a static asset like an image or JavaScript file. The file sits on the filing system during a location the online server is permitted to access and therefore the web server sends the file to the client with a 200 status code. If the client already requested the file and therefore the file has not changed, the online server will pass back a 304 “Not modified” response indicating the client already has the newest version of that file.
Nature of the HTTP Server
When you attempt to open MSN for that matter, your browser will create a network message like an HTTP request. Requests will travel all the way through the web to a computer where MSN features a running server which will handle this request by responding with HTML of the MSN home page. When your browser receives a response, it’ll render HTML so we will see the online page of the rendered error message just in case something goes wrong. Every interaction with the online page will send a replacement request and therefore the server will respond with new HTML.
So, now, let’s proceed to see how requests get to the server.
Listening
To get the destination, each HTTP message contains the destination TCP address. A TCP address is an IP address and port number.
By default, the port number is 80 for HTTP and 443 for HTTPS. And if the online server is listening on a non-conventional port, you’ve got to specify where the HTTP message should go.
Now that we more or less understand how requests travel over the web and find their destinations, let’s build an easy web server with Python.
Simple Web Server for Python
- First, we’ll have to import two libraries which will help us run the server and handle requests.
- Next, we’ll declare the port at which the server are going to be listening for the requests and make a handler of the HTTP requests.
- Finally, let’s run the server on the port we declared.
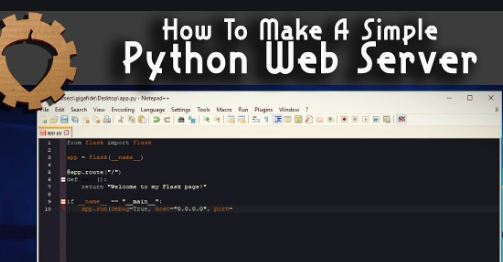
import http.server
import socketserver

PORT = 8000
Handling = http.server.SimpleHTTPRequestHandler

with socketserver.TCPServer(("", PORT), Handling) as http:
    print("serving at port", PORT)
    http.serve_forever()
HTML Server
Our server is prepared to travel , but we don’t have anything to offer the user back. Let’s create an easy HTML document to render something within the browser:
<html>
<head>
<title> Python Web-Server </title>
</head>
<body>
<h1> Hey Reader </h1>
<p> Our server is up and running </p>
<iframe src =https://www.intheblack.com/-/media/intheblack/allimages/magazine-2014/10-october/idea-running.jpg?rev=c7ef217571c146f9a2063fc13d717af6
width = "800" height = "1000" frameBorder ="a" >
</body>
</html>
Don’t forget to put the HTML document and Python enter an equivalent directory and name the HTML file doc.html.
Running the Server
Now it’s time to fireside up the engines and run our server. Let’s attend the directory where our Python file and HTML document are located. Run this command:
python3 server.py
We then get an output that the server is serving at port 8000.
Now let’s open a browser and navigate to the http://localhost:8000. Our HTML document has been served:

WRAPPING UP
The web server we have built here, is quite simple, though, it is ready to be used for HTML documents. So, here in this blog, we basically got an idea of building web-servers for various purposes and getting the job done. The logical principle behind, the servers of any website is generally the same.
Thus, by and through this article, I suppose I have made myself pretty clear. But, in case, you still have some doubts lingering. Then, please do write to me in the comments section and I am as always, ever-ready to help you. And, also solve your queries and problems.