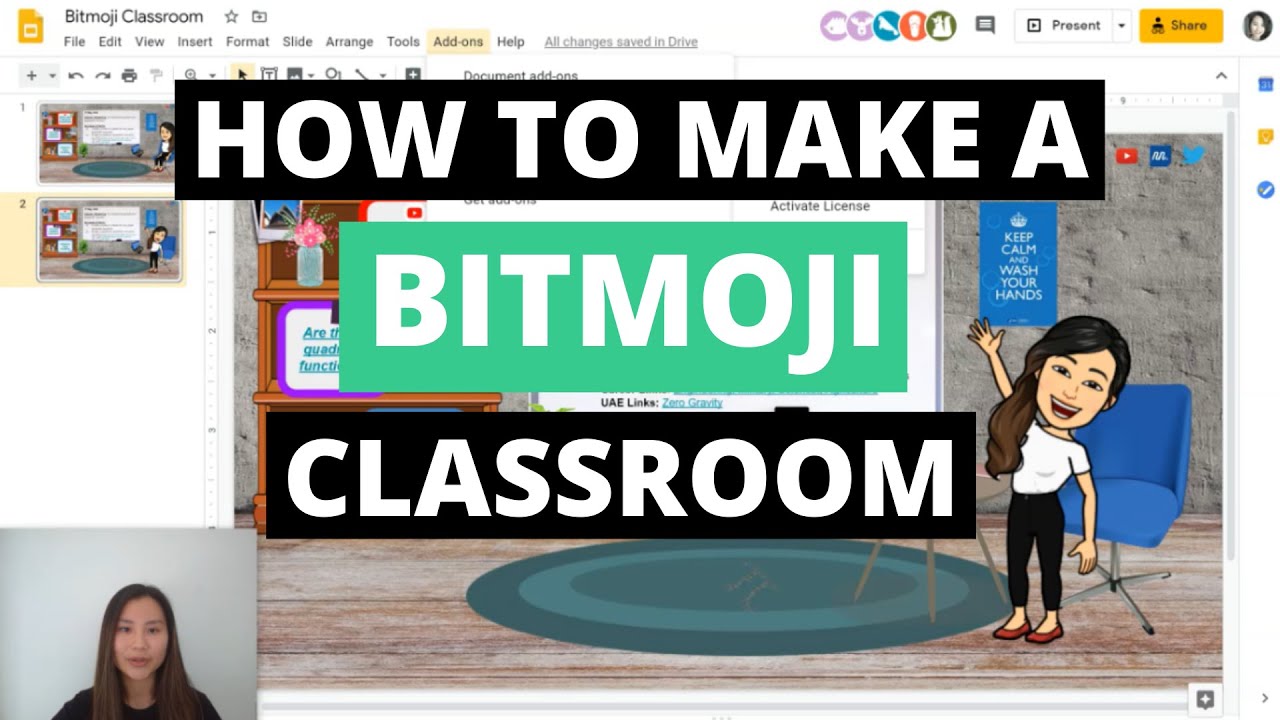
How to make bitmoji classroom so you must have seen it everywhere and also want to do this and make a amazing classroom of your own. So for people who haven’t seen or know about bitmoji classroom. Then let us tell you that Bitmoji Classroom is a fun way to recreate your classroom in Google Slides. It is very interactive and with links and you can create all sorts of decor. In these times of covid-19 teachers are ramping up there creativity and creating a friendly environment that there students can also enjoy.
Now do we have your attention or are you still wondering so to bring you here we will discuss more about how to make bitmoji classroom. So keep reading its going to be a fun ride.
Also Read: Custom Cursor for Chrome: Different methods
Here is a step guide of How to make bitmoji classroom:
STEP 1: OPEN A POWERPOINT OR GOOGLE SLIDE ?️
Firstly, you should keep the default page dimensions if you want to create a Google Meet or Agenda slide. Now let’s move on to next step. In this step you have to decide if you want to create a Google Classroom header. For this, start by changing the page dimensions to 1,000 x 250 pixels. You can achieve this by going to File —> Page Setup in Google Slides or Design —> Page Setup in PowerPoint.
WARNING: You may get a dark overlay on your image when you are uploading your banner on Google Classroom. So, ensure to keep everything as bright as possible as it is due to accessibility and cannot be changed.
The dimensions to create a custom Google homepage should be around 15 in x 8 in.
STEP 2: COLLECT YOUR PICTURES ?️
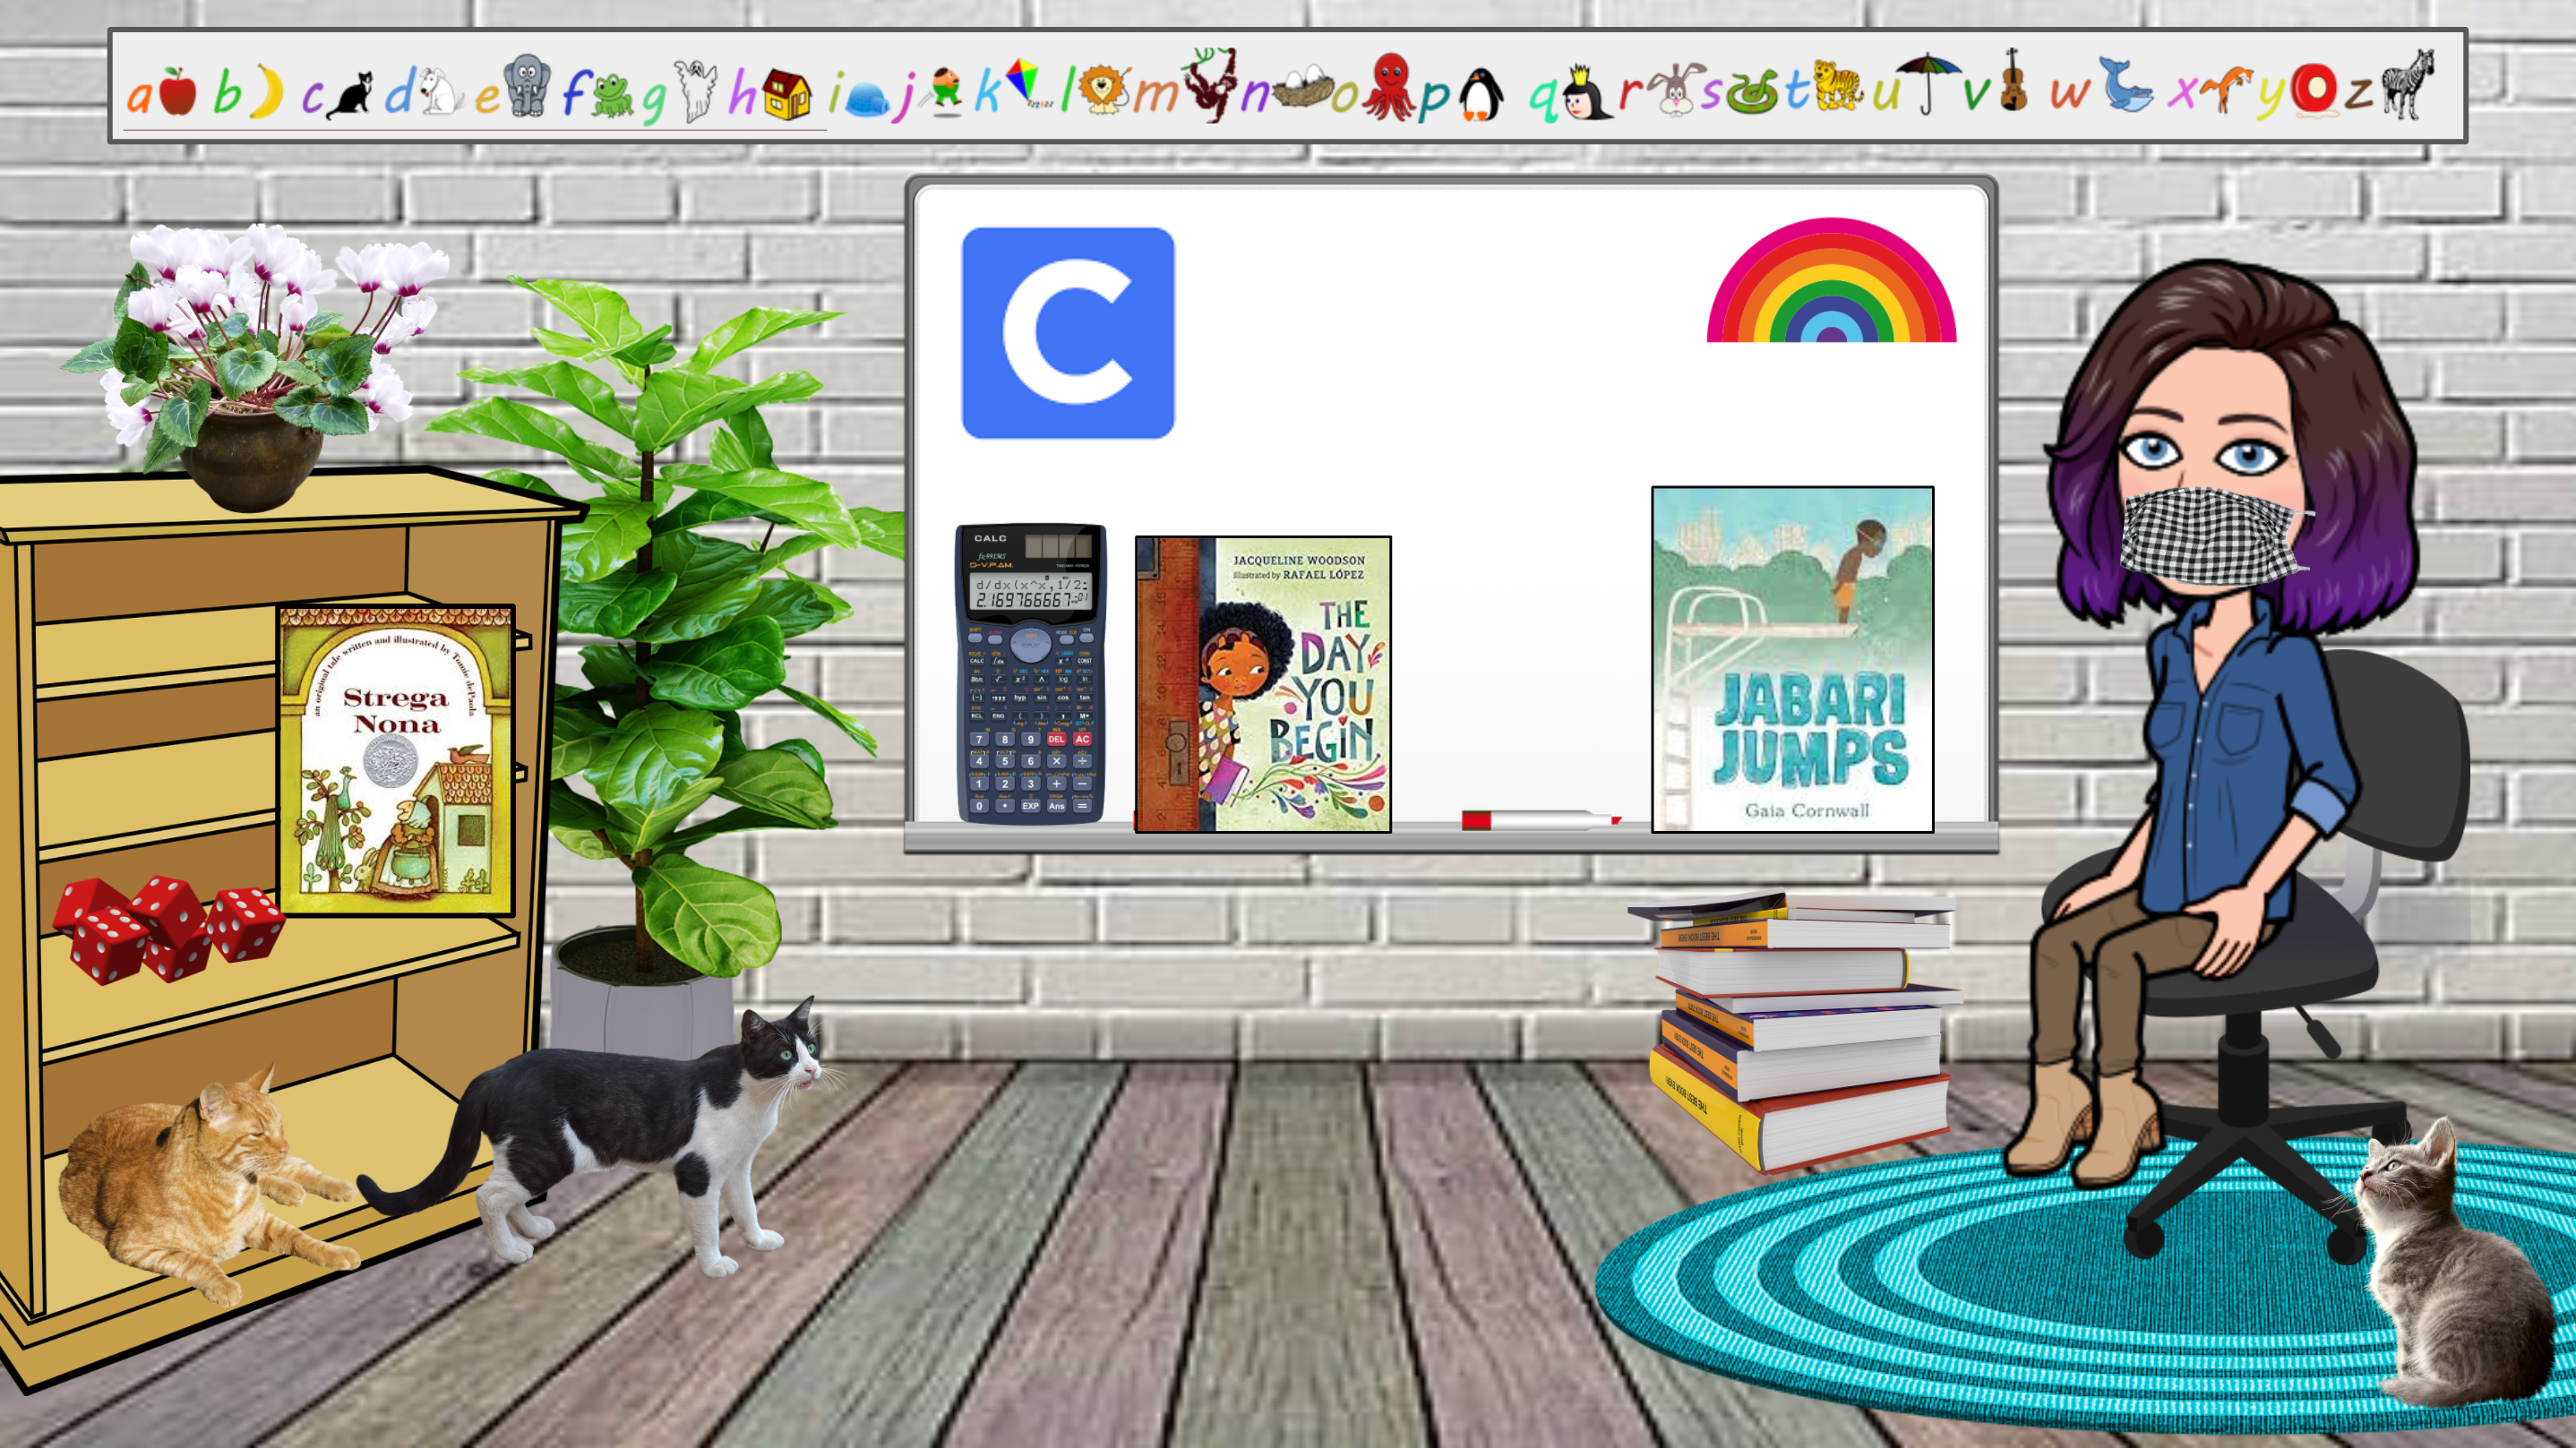
As the heading suggests, in this step you have to collect pictures for your scene. You can select these pictures from Google Images and other websites as you wish.
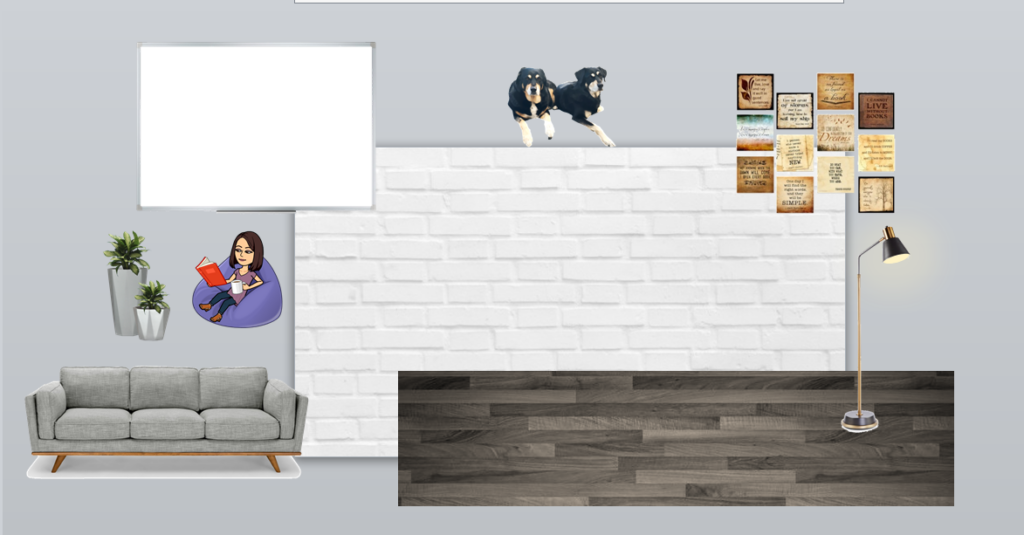
As you can see in the image, the background has been searched from Google by writing “white brick wall” and “wood floor”. Then it was arranged in a way that it looks normal. You can also try searching such images from Google or save a picture that is a combination of the two.
The bitmoji that you see in the above image can be added by using the Bitmoji Chrome extension. You just have to click on the Bitmoji icon present on the browser bar. Then choose the Bitmoji you want, drag it and drop it onto the slide. If you want your Bitmoji in PowerPoint, then start by clicking on the Chrome extension icon. You have to save this bitmoji as an image by doing a right-click on the Bitmoji you want. Now you can easily insert this image wherever you want in your powerpoint.
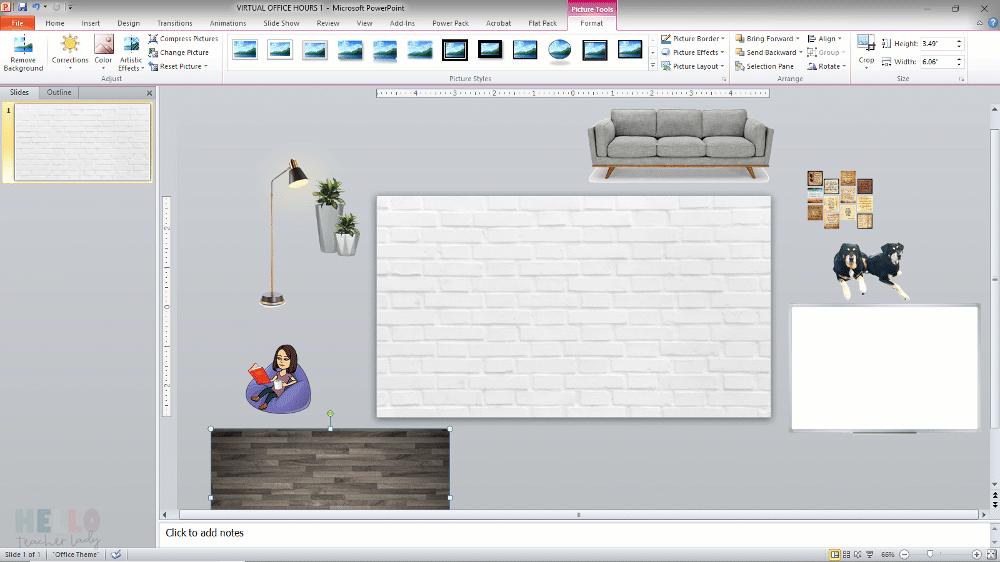
STEP 3: CREATE THE SCENE ?
You can start creating the virtual scene after you have completed selecting pictures and background.
SOME EDITING TIPS?
- Please ensure that you are resizing images from the corner point of the selected image. Because of this the height and width proportions of the resized image are maintained.
- You can layer an image below other by doing a right-click. Then select Order —> Send to back on Google Slides. You also have the option to right-click —> Send to Back on PowerPoint.
Following is a time-lapse video for you to have a look into the process:
STEP 4: ADD VARIOUS LINKS (OPTIONAL) ?
To make your virtual classrooms more fun, you can add interactive links on specific images. This will take your experience on another level and you can create scavenger hunts, virtual libraries and other things through this.
Firstly, click on the image you want link and then click Ctrl + K in Google Slides. You also have the option to right-click —> Hyperlink in PowerPoint. And now just paste this in your destination link and you are done.
Conclusion:
In these times of pandemic we are almost at all the times having online classes and meetings. It is very important to have a everyone’s attention. So here is how to make bitmoji classroom and keep everyone interested. Hope you find this blog useful. Thankyou for the read.