
Screenshots are the screen grabs or screen captures which come generally handy to grab images from sites , capture desktop applications, and make program know-hows. In Windows and Mac OS systems, screenshots can be taken by various methods like using the Snipping tool or for that matter, we can also use, Print Screens. But, sometimes it is difficult to find where these screen grabs are. Therefore, in this post, we will be discussing, where do print screens go
How to take Screenshots?
Well, there are tons of built-in programs and free tools (Snipping Tool, Mac Grab, etc.) to capture your screen. But, if you would like to have tons of screenshots and need more flexibility and robust tools, Snipping tool may be a great option.
One of the simplest parts of capturing your screen with Snagit is that you simply can show people exactly what you see on your desktop.
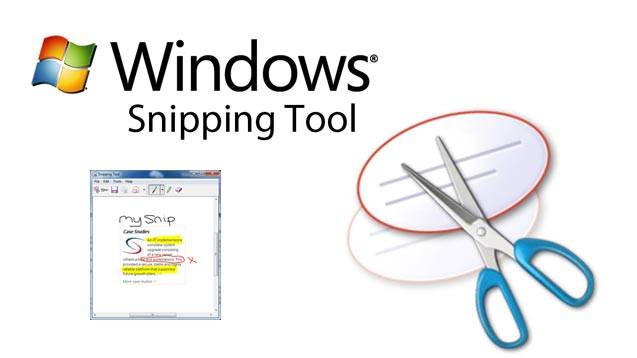
What is Snipping tool?
The Snipping Tool has been around for a very long time, since the Windows Vista days. Windows has warned for a couple years that the Snipping Tool is moving away, but it’s still kicking around. The Snipping Tool has been de-listed from the list of apps from the Start menu, but it’s easily accessible via the search bar.
Click the New button to begin the screenshot process. The default snip type is a rectangular snip, but you can also take free-form, full-screen and window snips.
The Snipping Tool does not automatically save your screenshots — you will need to manually save them in the tool before you exit — and it does automatically copy your captures to the clipboard.
What is Snagit tool?
The first thing you’ll want to try to to is download and install your screen capture software to capture your screen today!
Download a free trial of Snagit to quickly and simply take screenshots of your display screen , mark them up, and share them.

Download a free trial if you don’t have already got Snagit, you’ll download it for free of charge and check out the software for 15 days. Snagit works on both Windows and Mac. So regardless of what platform you employ it’ll work on your system.
You can capture your entire screen or only a specific portion of it. The screenshot automatically opens within the Snagit Editor where you’ll preview, edit, and share the capture.
How to grab screenshots on PC –> Where do print screens go
- Click the Capture button or Press PrtScn (Print Screen Button).
- Once the orange crosshairs appear, click the Fullscreen button to capture the complete screen.
Full Screen Capture
To take full screen capture of a specific portion of your screen on Windows (any version after Windows Vista.
- Open the Capture window.
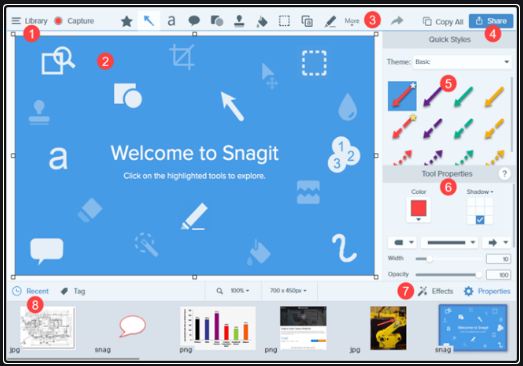
In the Notifications area, click the red TechSmith Snagit icon to open the Capture window on the screen. If you’re within the Snagit editor, click the Capture button within the toolbar to mention the Capture window.
- Choose your screen capture settings.
The Capture window gives you tons of flexibility counting on what sort of screen capture you would like to require . Grab your entire desktop, a region, or a window with Snagit’s All-in-One Capture®. Take a fast image screenshot, or maybe record a video.
- Click the Capture button.
Clicking the Capture button on any tab within the Capture window to start out your screen capture. You’ll also start a capture with the present settings by pressing the PrtScn button (Print Screen), which is generally, the default global capture hotkey. you’ll also customize and alter the worldwide capture hotkey.
- Now, Click and drag the crosshairs to require a screenshot of the active window.
How do we take screenshot of a window on Mac
- Click the Capture button or press Control-Shift-C.
- Move the cursor over the window to capture. When an orange dashed border appears round the window, click to pick the highlighted area.
How to take screenshot of a menu on Mac
- First, select the Image tab within the Capture window.
- Next, select Menu within the Selection dropdown.
- Select the Delay option and set the amount of seconds for the delay. (Optional).
- Click the Capture button or press Control-Shift-C.
- Finally, your countdown will begin. Open the specified menu, and move your cursor over the menu to capture.
After you’re done, you’ll save your screenshots or add polish with the image editing features in Snagit. This may you offer you a faster and better workflow than simply using the print screen key and Microsoft Paint.
WRAPPING UP — Where do print screens go
In this post, as you have seen we discussed about the screenshots. What are screenshots? How to take screenshots on various devices like your Windows PC or Mac device. Also, the different methods and tools to employ to get a good grab of the contents on your screen by the screen capture method. Now we thus, know about the various technicalities.
By and through this article, thus, I suppose I have made myself pretty clear. But, in case, you still have some doubts lingering. Then, please do write to me in the comments section and I am as always, ever-ready to help you. And, also solve your many queries and problems.
Until then bidding you Good-Bye !!! Ok, wait ….. before you go, you may check out my various other posts. Also, for the simple reason, that is, to enhance your knowledge on various other topics of importance. Also, where ??? Here……