
Google cloud jupyter notebook is an open source web application that allows you to run live code, embedded visualization and explanatory text all at once. Google cloud jupyter notebook is an AI platform Notebooks (Jupyter Lab) is a Deep learning virtual machine. It comes with an instance of latest machine learning and data science libraries pre installed. It also has option of with the option to include Nvidia GPUs for hardware acceleration.

Google cloud jupyter notebook is also embed with different languages that you can use as per your requirements. The languages are PHP, Ruby on Rails, Spark, Matlab and many more. And if you try install these languages applications that can be difficult and tedious and can take a toll on your system. So this is an easy guide of Google cloud jupyter notebook. Where you can easily get the job done without putting any effort on your laptop but you have to pay. So let’s get started on how to get started with Google cloud jupyter notebook.
Also Read: Google Cloud vs Google Drive: Some Basic Difference
What is Google cloud jupyter notebook?

The Jupyter Notebook is a living online notebook, letting faculty and students weave together. Computational information (code, data, statistics) with narrative, multimedia, and graphs. Faculty can use it to set up interactive textbooks, full of explanations. Examples which students can test out right from their browsers. Students can use it to explain their reasoning, show their work, and draw connections. Between their classwork and the world outside. Scientists, journalists, and researchers can use it to open up their data. Share the stories behind their computations, and enable future collaboration and innovation.
Best practices that can improve the life of any developer using Jupyter notebooks:
Using a version control system with your Jupyter Notebooks:
Using a version system with your Jupyter Notebooks can be beneficial to you in quite a few ways. One of those is that it can record changes made to the code over time. So you can revisit your code and see the changes later. The version control also lets you make spereate parellel brances so you can review your code without any problem.
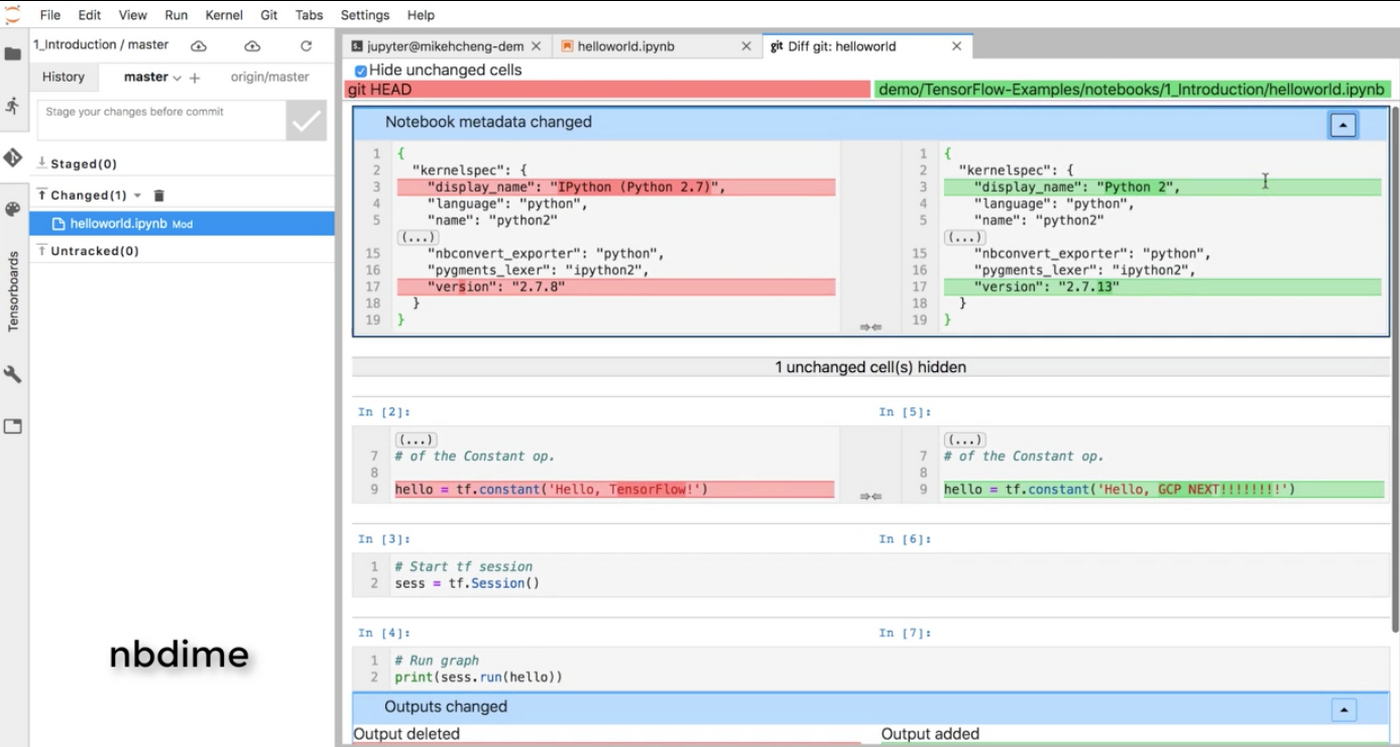
So in order to use the version control system like git to its best of use. So you have to have a good tool well integrated into the Jupyter UI. The Google cloud jupyter notebook allows any data scientist to quickly resolve issues for the notebook. View the history for each cell, and commit and push particular parts. The notebook to your notebook’s repository right from the cell.
Reproducible notebooks:
When you are writing a notebook you should keep in mind. That your Google cloud jupyter notebook should rerun on the same inputs and also give the same output. The notebooks should run from top to bottom. And also should contain the information required to set up the correct, consistent environment.
How to use it in a proper way:
So a notebook that is reproducible should have following features:
- The Compute Engine image and underlying hardware used for creating the Notebook should be embedded in the notebook itself.
- All the dependencies should be installed in notebook itself.
- A notebook that is executable should run from top to bottom without any errors.
Continuous integration:
So Continuous integration mainly is a practise that is followed by the software developers to integrate the code into the repository. So as in early stages the check-in are verified so team can check the mistakes in early stages. When you make a change to Jupyter notebook it should be validated to have continuous integration. System before being checked in; this can be done using different setups (non-master remote branch, remote execution in local branch, etc)
Continuous deployment:
Each version of the Google cloud jupyter notebook that you are using should pass all the test. It should also automatically produce a new artifact and deploy it to staging and production environments.
Now after you have established a CI system that generates the tested a tested, reproducible, and parameterized notebook. After that lets automate the generation of artifacts for a continuous deployment system. Based on the previous CI system, there is an additional step in CI to upload a payload to Cloud Functions when tests are successful. When triggered, this payload sends the same artifact build request with parameters to Cloud Build, spinning up the instance and storing the results.
Before you begin on Google cloud jupyter notebook:
So before you can use the Google cloud jupyter notebook you should have Google Cloud project and also enable the AI project notebook for the platform. So to enable the AI project notebook you should follow these simple steps:
- First you have to go to Google cloud console on the project selector page then you should select or create a Google Cloud project.
- Then you have make sure that your billing is enabled on Cloud project.
- After that enable the AI Platform Notebooks API.
- And if your planning to use the GPU in your AI Platform Notebooks API. Then you should go to the check the quotas page in the Cloud Console to ensure that you have enough GPU available for your project.
Now let’s hop on running the Google cloud jupyter notebook:
So following are some simple and easy steps that you can follow to run Google cloud jupyter notebook:
- First step: That you should do is verify the payment information and then verify the account. It will ask you automatically you don’t have to worry about anything.
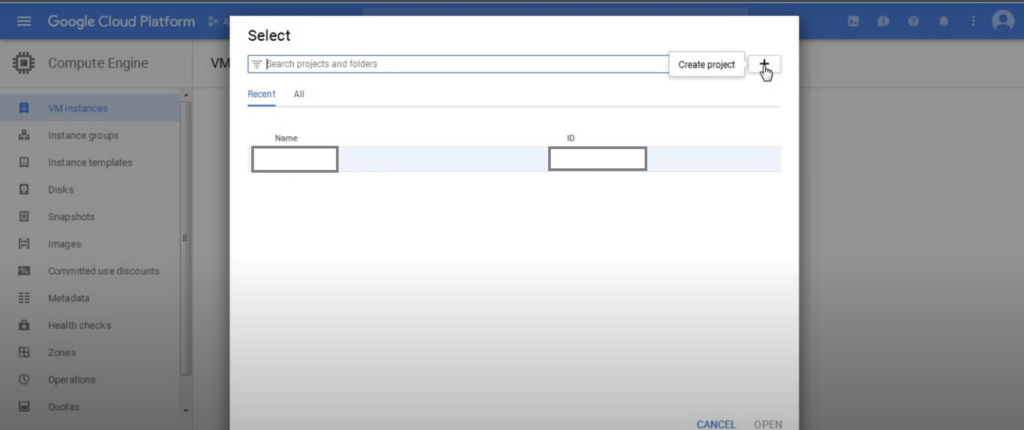
- Second Step: In this step you also have to do two simple things first you have to click on the three dots that look like a triangle and then click on the (+) sign to create a new project.
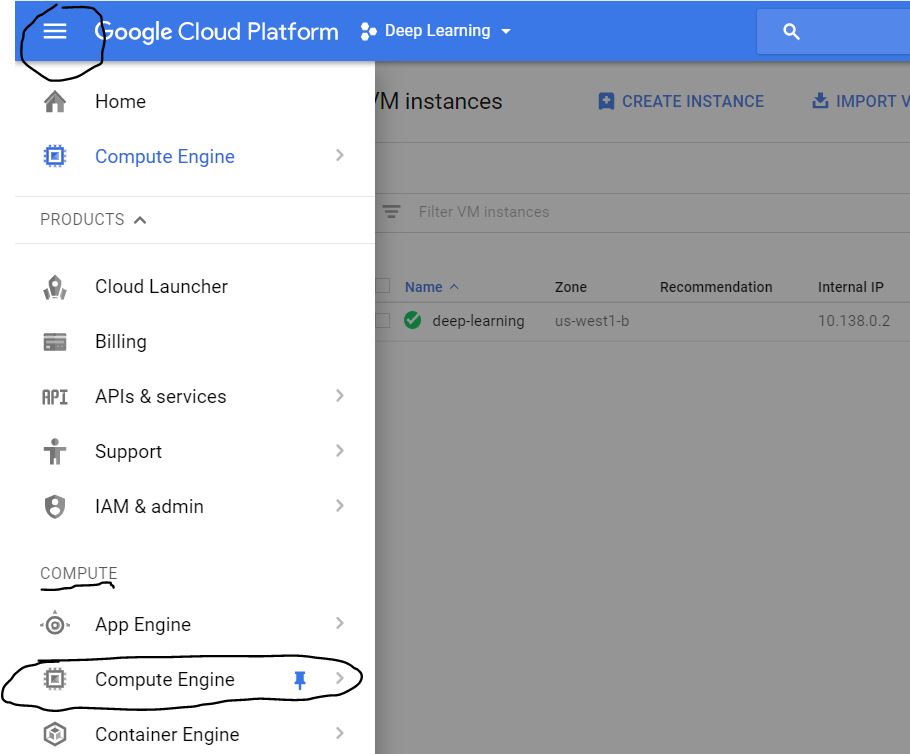
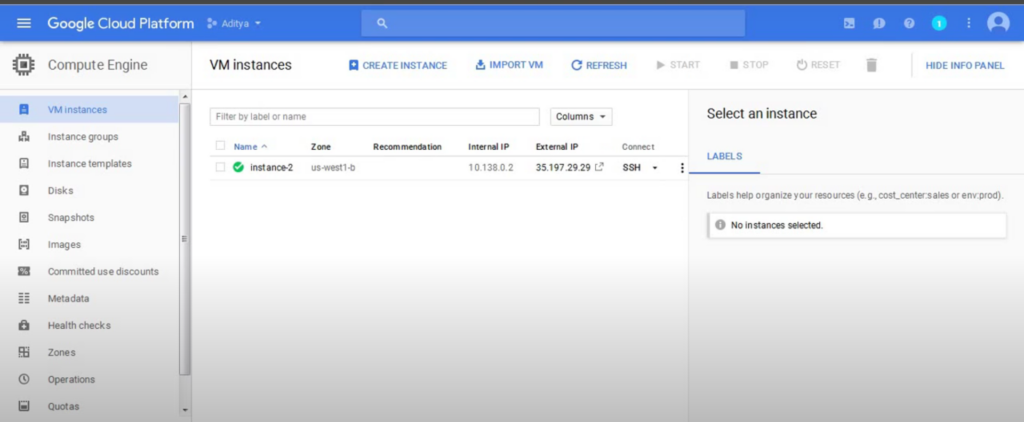
- Third Step: Then create VM instances for that you have to go to the the 3 lines on the top left of your screen and then click on the Compute engine.
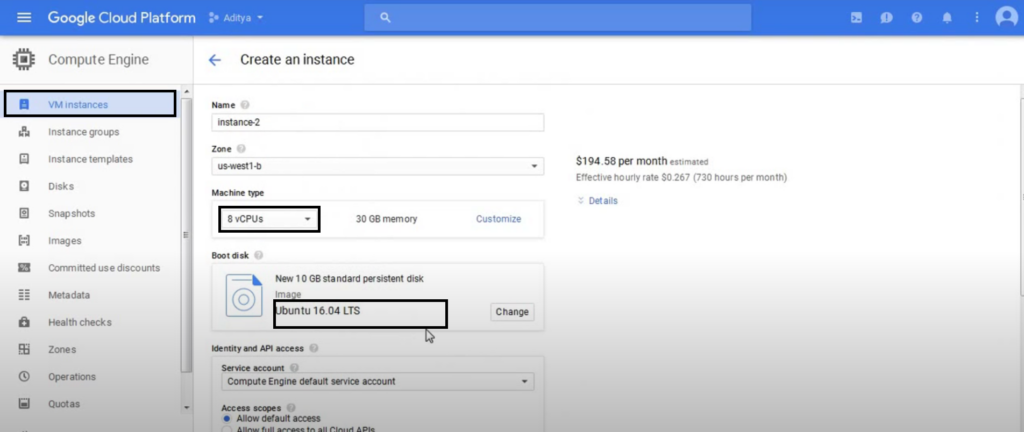
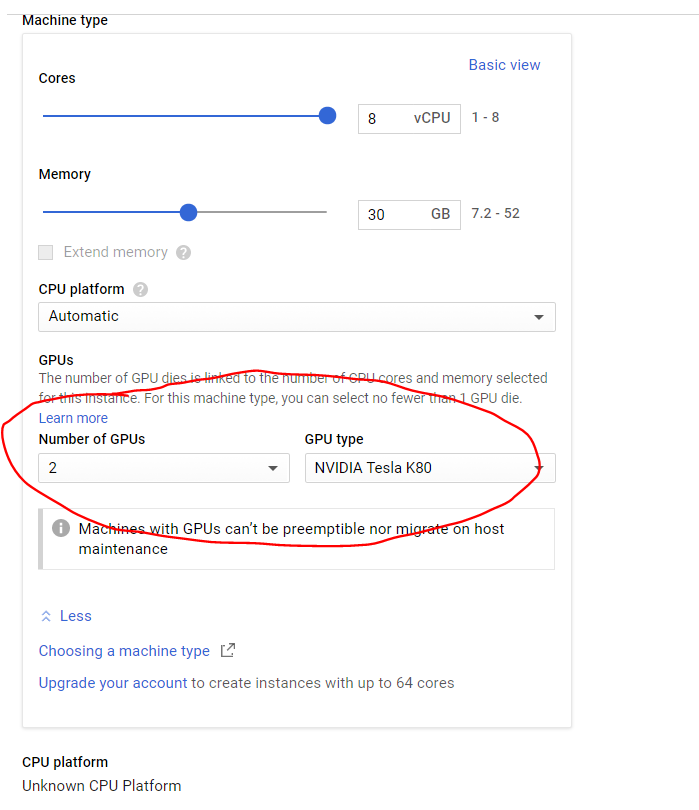
Now just click on the create new instance. Now do these simple things Name your instance, select zone as ‘ us-west1-b’. Choose your ‘machine type’. (I chose 8v CPUs).
After that you have to select your boot disk ‘Ubuntu 16.04 LTS’. Then after that you have to tick the ‘http’ and ‘https’ options on the firewall option. Make sure you do it because it is an important thing. After that you have to choose the disk tab then untick the ‘ Delete boot disk when instance is deleted’.
Then after that you can click on the ‘customize’, you will be able to find options for using GPUs. You can choose between 2 NVIDIA GPUs.
Firewall settings that you should keep in mind because those are important:

Now just click on the create and your instance is ready in an instance.
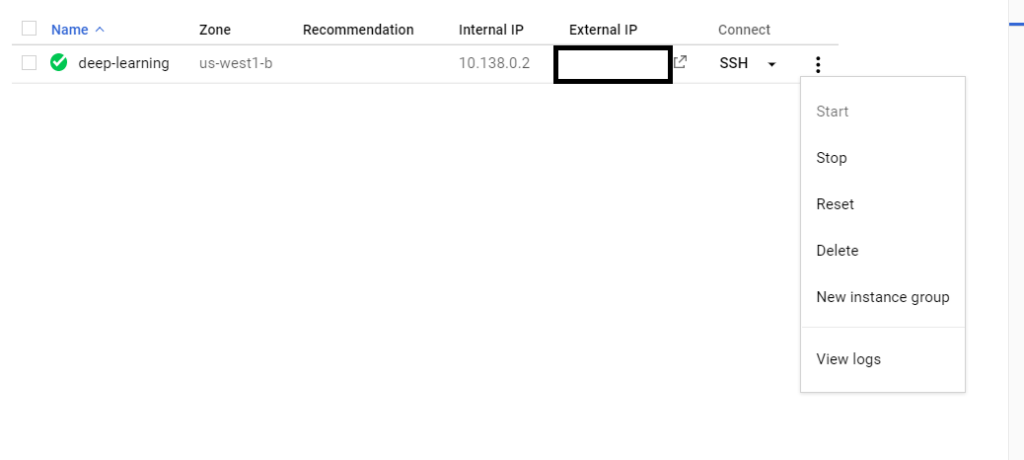
After that you have to you have to stop your GPU instance. Just click on the Three dots as shown in the image and click on the stop or GPU will keep charging YOU ON AN HOURLY BASIS.
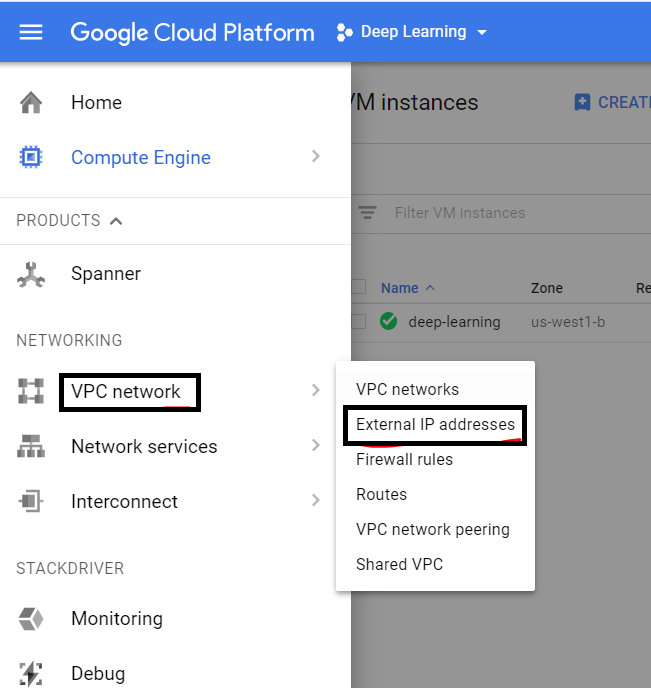
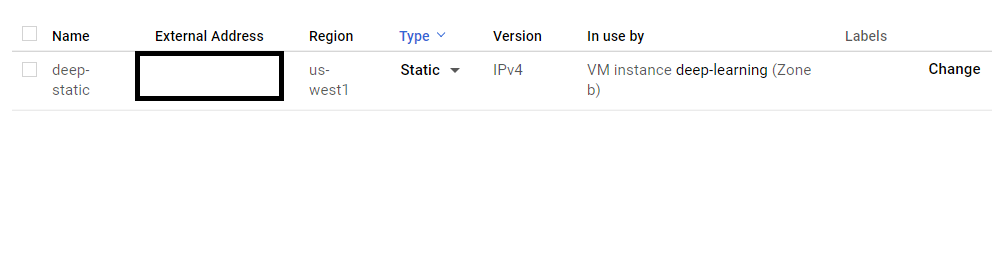
- Fourth Step: So the external IP by default is dynamic so you have to make it static to make your life easier. So go to the 3 lines on top left of the screen and then under networking, click on VPC network and then External IP addresses.
Then after that change the type from Ephemeral to Static.
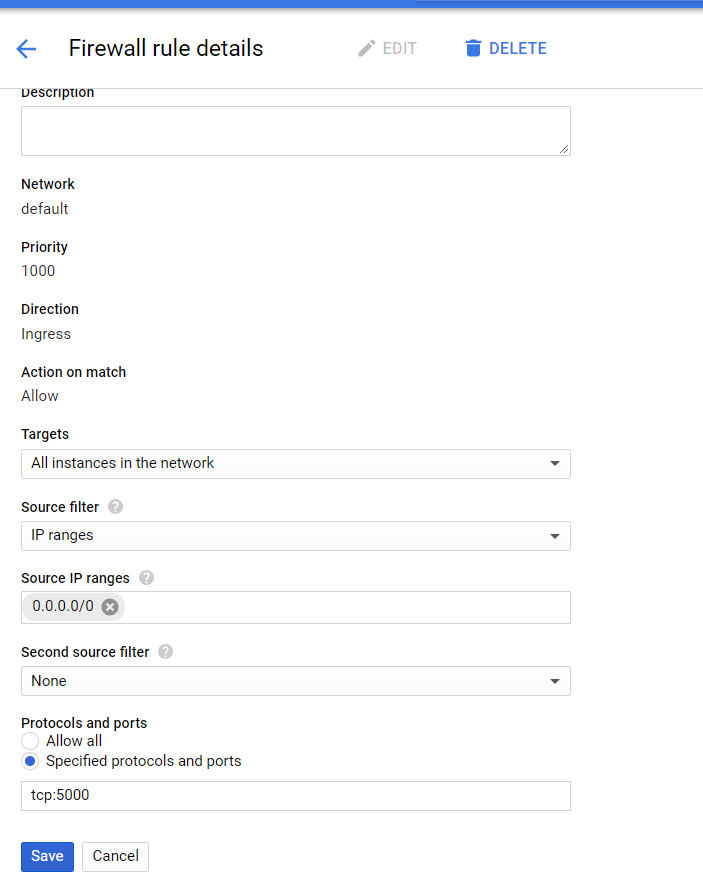
- Fifth Step: Now you have to change the Firewall setting in the networking.

Now you have click on the Firewall rules and then click Create Firewall Rules and then do the settings as in the image down below:
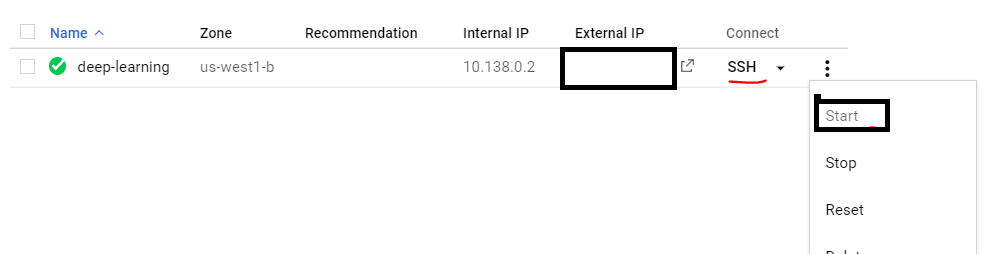
- Sixth Step: Now you just have to start your VM instance. Then you see the green tick on the SSH. And now this will open a command window and now you are inside the VM.
- Seventh Step: Now you have to enter the following code in SSH terminal.
wget http://repo.continuum.io/archive/Anaconda3-4.0.0-Linux-x86_64.sh
bash Anaconda3-4.0.0-Linux-x86_64.sh
Then after that just follow the steps. The default settings usually works fine but if you can’t figure it out just press Yes. It’s about the location it has to be installed.
Do you wish the installer to prepend the
Anaconda3 install location to PATH
in your /home/haroldsoh/.bashrc ?
[yes|no][no] >>> yes
Now to use the Anaconda right now source your bashrc:
source ~/.bashrcNow you have to install other softwares:
pip install tensorflow
pip install keras- Eight Step: Now just open your VM instance in SSH session. Check if you have a Jupyter configuration file:
ls ~/.jupyter/jupyter_notebook_config.pyAnd you see if it doesnt exist you can just create one.
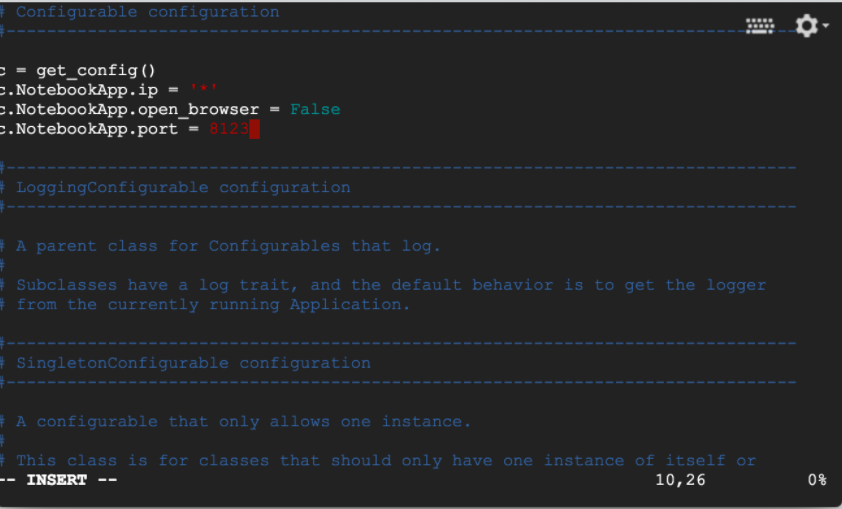
jupyter notebook --generate-configNow you can just add few lines of code for Jupyter configuration file; the file is plain text so, you can do this via your favorite editor (e.g., vim, emacs).
c = get_config()
c.NotebookApp.ip = '*'
c.NotebookApp.open_browser = False
c.NotebookApp.port = <Port Number>
And it will look something like this
- Ninth Step: To run jupyter notebook just type in the following command in the ssh window you are in:
jupyter-notebook --no-browser --port=<PORT-NUMBER>Now when you type in the command and it will look like this:

You just have to type the following command to run jupyter notebook.
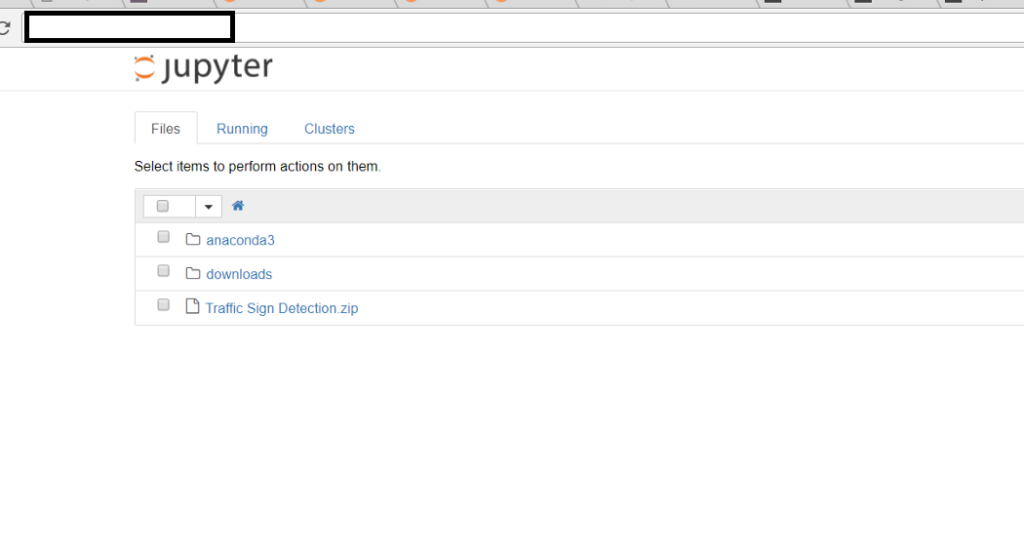
http://<External Static IP Address>:<Port Number>Now your jupyter notebook will just open. And congratulations its all done and ready to go.
Conclusion:
In this blog we have provided you with the details of how to run Google cloud jupyter notebook. And what are the common practises that you should follow to make the Google cloud jupyter notebook to its fullest use and some basic knowledge about the Google cloud jupyter notebook. Hope you find what you are looking for here. Thank You for the read.